Beyond Fuji’s film simulations — the secret recipe for more believable film look
In addition to actually shooting film, what else can you do to make your photos look more like film?
Fujifilm offers some extremely nice looking film simulation colour profiles and you can find a plethora of advanced custom settings (recipes) online, but as compelling as they are, they won’t by themselves perhaps deliver 100% believable illusion.
Here are few simple tricks that involve couple of optical considerations and couple of pointers regarding some less obvious (but critical) shooting techniques, that you probably didn’t know about. These are all camera techniques, meaning your photos will look great straight from the camera without any editing.
First we need to understand that film look pretty much comes from imperfections, which means we need to use every available trick to slightly crappify our photos.
1. Downgrade your optics with vintage lenses
Use a manual focus vintage lens. There are several reasons for it. Any of your native Fujifilm X-mount lens will simply be technically too good to create the illusion. We need softness with only a hint of sharpness, not technical perfection. So don’t worry about sharpness or even nailing the focus. If the photo is a bit blurry, it will just amplify the effect.

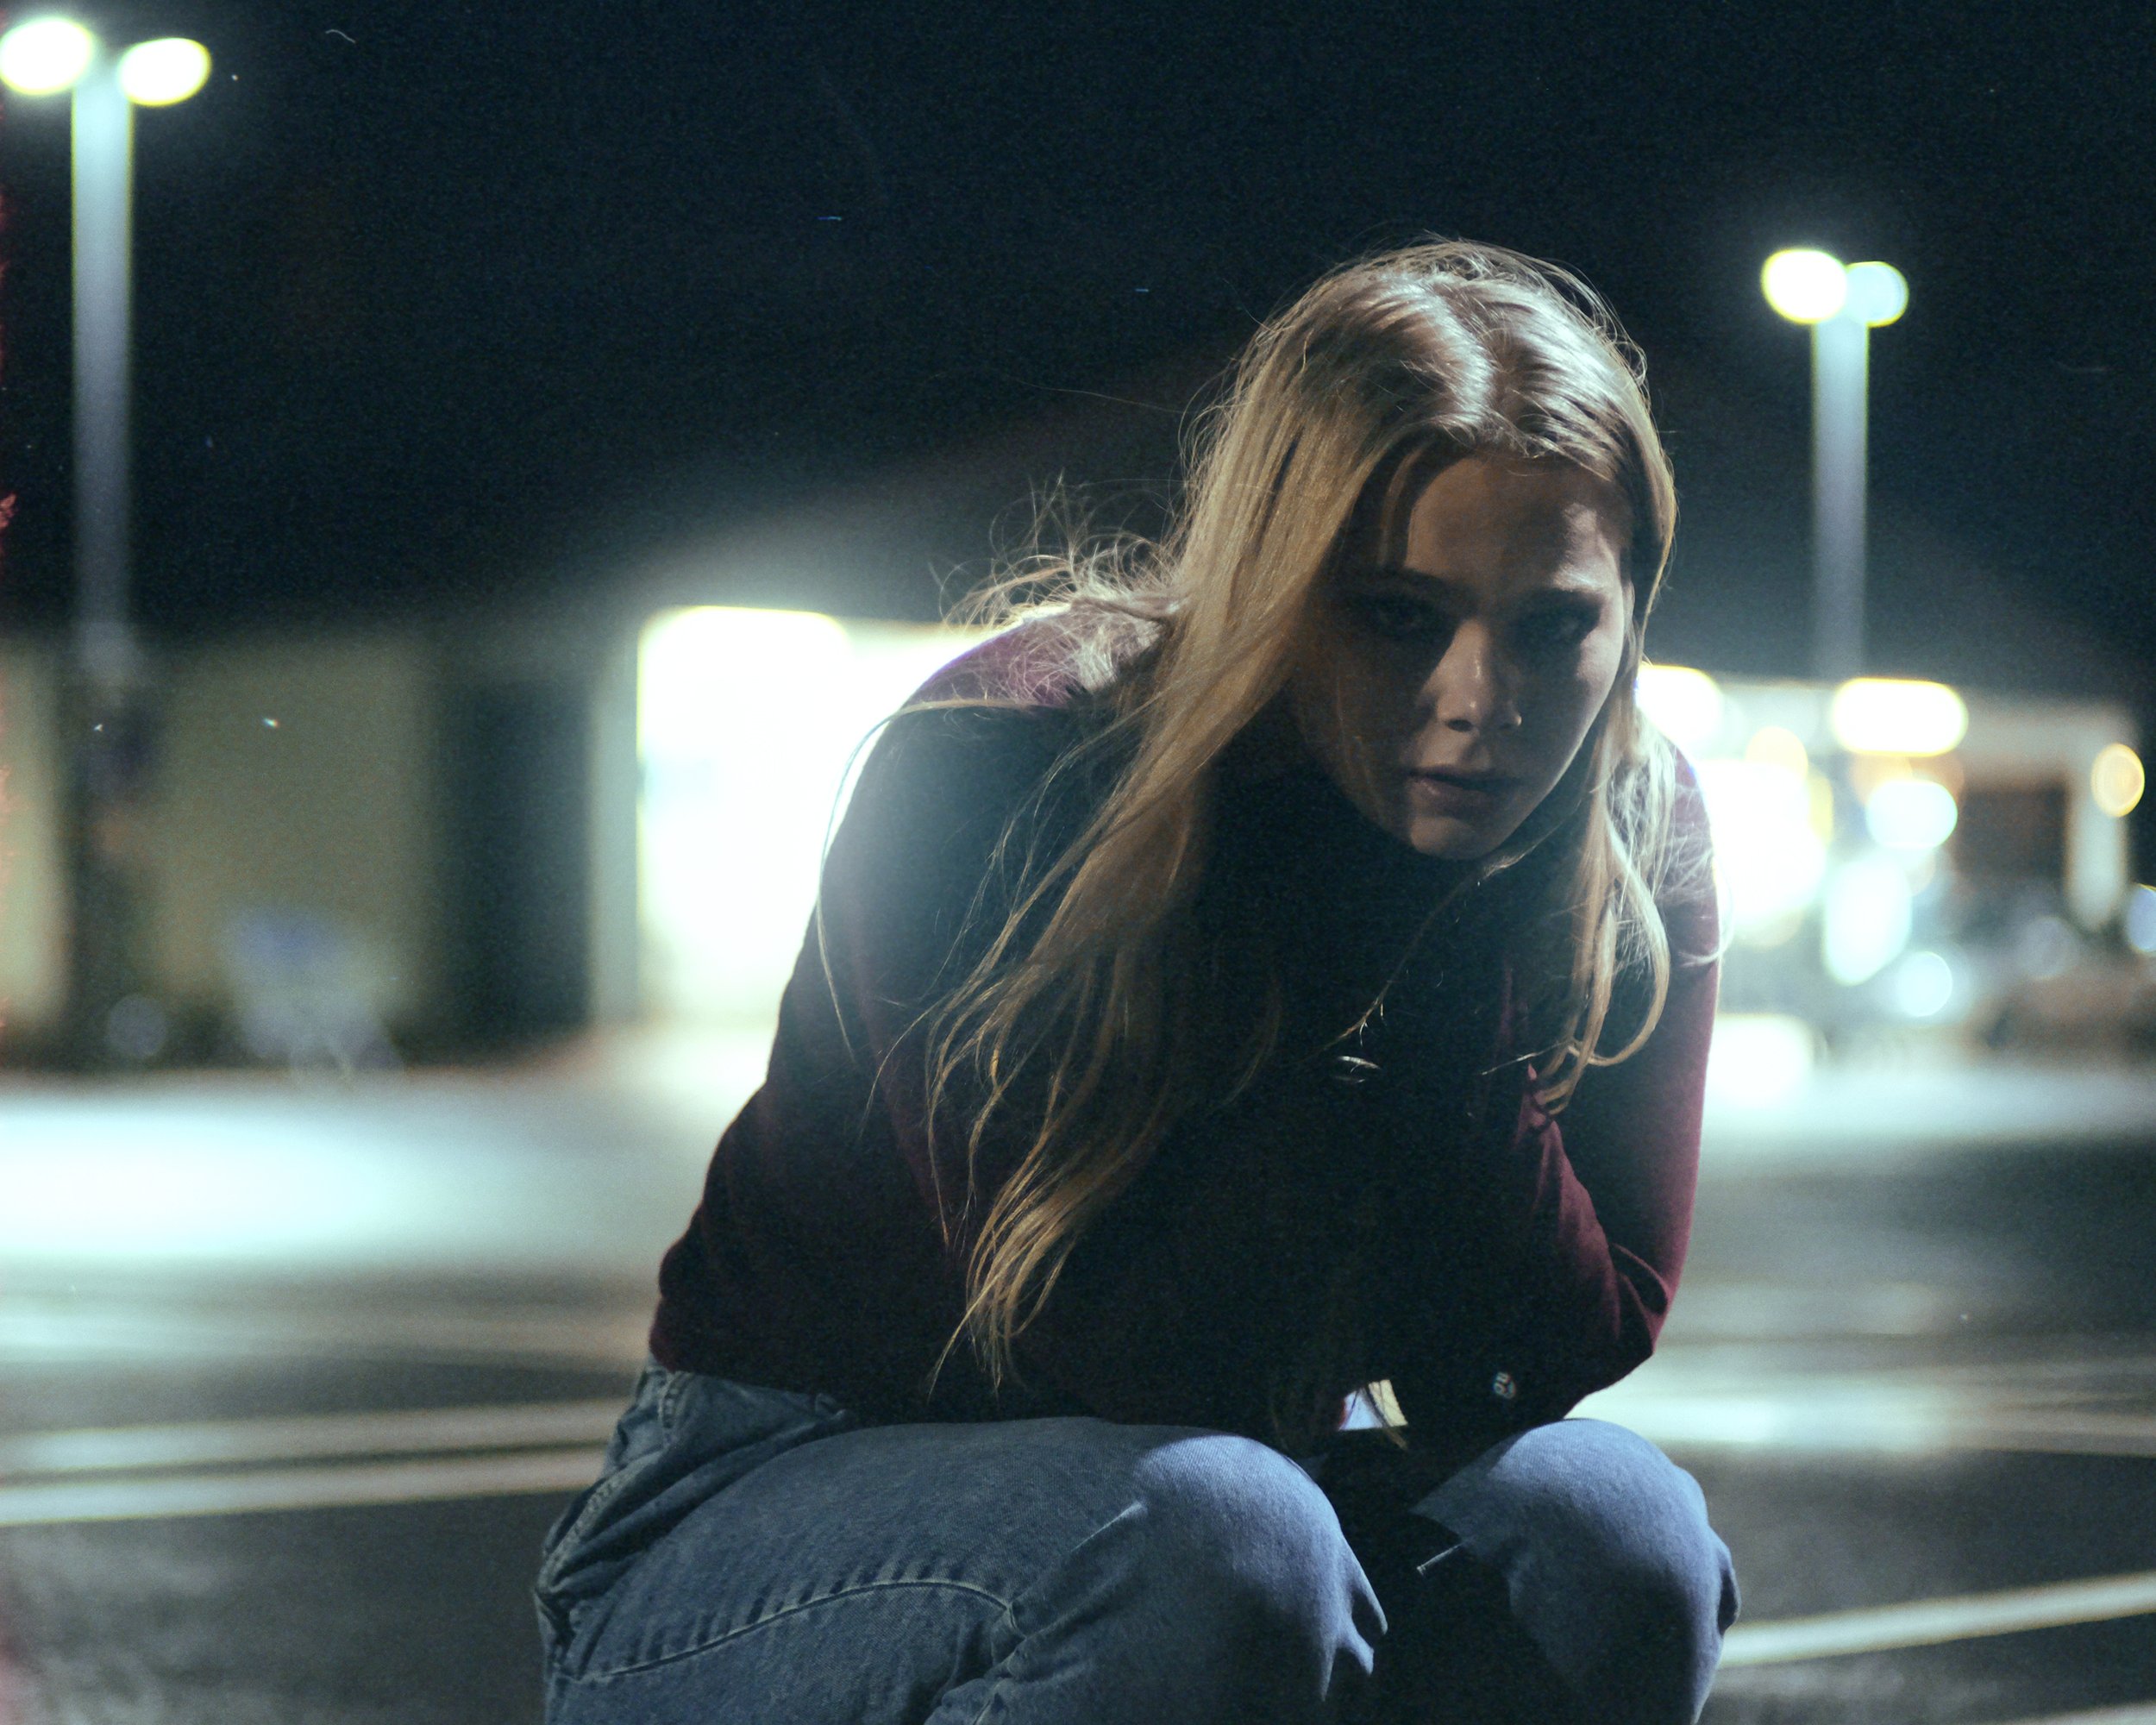
Canon FD 50mm f1.4 manual focus vintage lens

A scene shot with Canon FD 50mm f1.4 (wide open) straight against the backlit subject. The soft flaring creates a very pleasing and organic look that resembles that of a medium format film photograph.
Any old 50mm f1.8 (for example) will do just fine. The cheaper the better. Shoot wide open to fully embrace the optical inferiority. Old lenses especially will be somewhat soft wide open. That’s good. Old lenses also feature outdated coatings that will flare like nobody’s business. That’s good too.
Narrow depth of field, especially on old lenses can create really interesting effects. Some lenses with really smooth background blur, aka bokeh, can create a nice resemblance with medium format.
2. Mist filter for light diffusion
Also consider using a mist filter. You don’t even have buy one. You can make one at home by spraying a very light coat of hair spray to any cheapo UV-filter. Mist filter will diffuse light beautifully, thus making it look less digital. It will soften the hard edges very smoothly, without looking gimmicky.

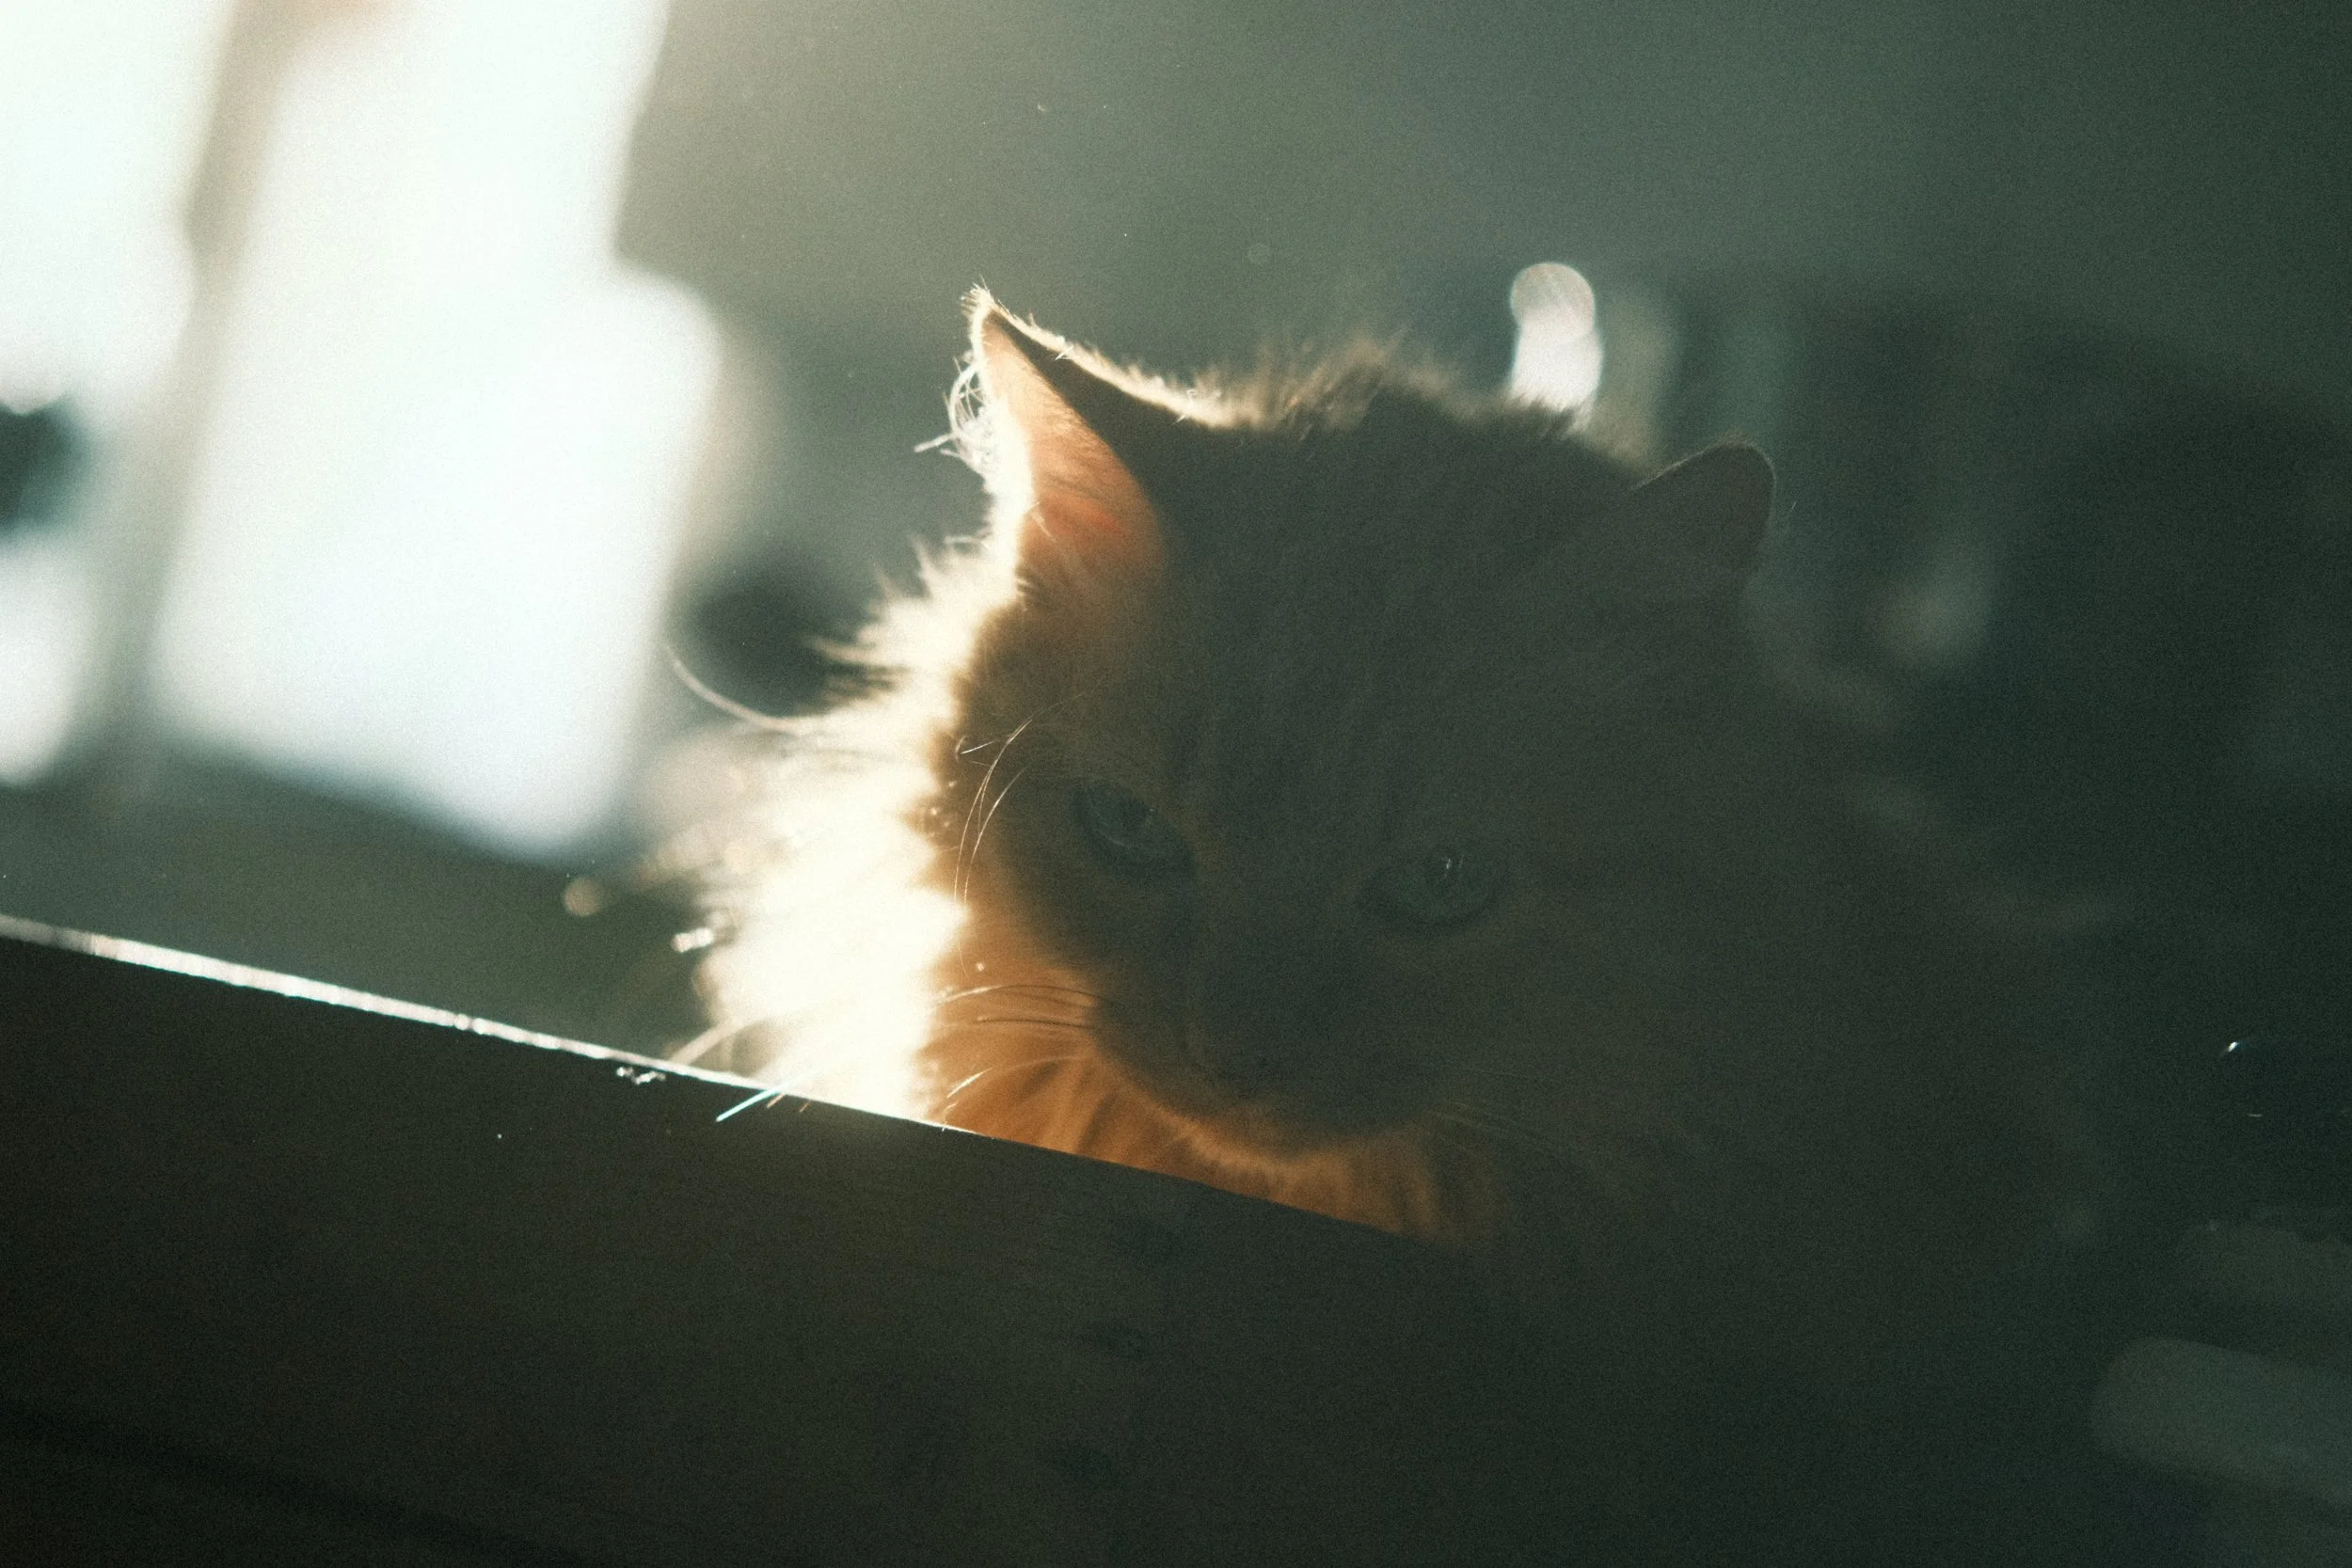
Mist filter + flaring.
The strong background blur combined with the mist filter diffusion really helps to give an analog impression. Observe how the light directly behind the subject flares out beyond the contrasting edge, blending them together and creating an overall smoothness. Model credit: Madeleine Hahl

DIY mist filter was utilised for these shots. A semi-heavy coat of common hair spray was applied onto an old UV-filter for a point-and-shoot look. The hair spray coating took away the lens sharpness and diffused the highlights very nicely. The creative effects were amplified via long exposure times and the usage of flash. These were shot with Fujifilm X-E3. Some amount of editing (scan dust was added in Photoshop and colours funkified with a Snapseed filter) was done in post production, but most of the creative control was done in-camera. Model Credit: Madeleine Hahl
3. Shoot backlit subjects
Now that you have your optics set up for flaring and diffusing, it’s time to consider the lighting conditions. Favour backlit subjects to make the most out of the flaring capabilities of your vintage lens. You’ll also get the most out of your mist filter.
Here you can see how nicely the mist filter blends together the strong backlight and the shadow areas with smooth, diffused flaring. This shot is straight from the camera. No edits what so ever. Model credit: Ninni
4. Under and over expose
Another neat trick that you implement is to slightly mess up your exposure on purpose. Automatic metering somewhat lacks the artistic vision that only you can have. It’ll make the decision for you, based on what it thinks will look ok.
Digital photos have the tendency to blow the highlights very easily, so underexposing like you have absolutely no idea what you’re doing, will first of all ensure that you’re protecting your highlights and also amplify the film effect by simulating organic looking exposure.
Over exposure on the other hand can really help to create that pastel, washed out cotton candy tonality, but just beware the clipping highlights.
5. Film simulation recipes
In addition to all the previous steps, remember to implement your favourite Fujifilm film simulation recipe. Some of the most creative recipes can really give a nice final touch with wonky and unusual tones, that aren’t typically expected from a digital photo.
And there you have it! With these tricks you should be able to create a pretty darn believable illusion for digital photos that look like film. Enjoy! ☺️
Related article: Medium format film look on Fujifilm (perfect recipe)